Complete tutorial
LastPass Password Manager
Are you using the same password for everything?
Then you’re at risk!
Weak & re-used passwords are the #1 reason accounts get hacked.
But you don’t have to live in fear of someone stealing your information or money.
The solution is to use a password manager.
A password manager creates super strong passwords for you and keeps track of those passwords so you don’t have to remember them.
LastPass is the best password manager because it’s easy to use, super secure and it works across all your devices.
In this guide, you will learn:
- How to Fix weak and reused passwords
- How to use the best LastPass features like emergency access and two factor authentication
- How to choose between the free, premium and family plan.
- And much more!
Let’s get started!
Step 1 - Create an Account
To get LastPass free, click on the link below:
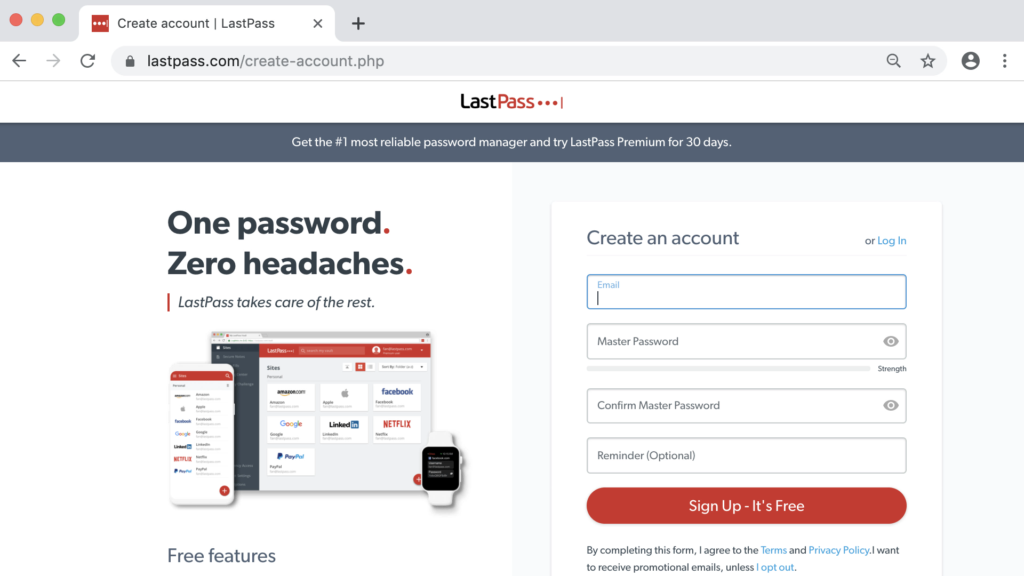
This will take you to LastPass where you can create your account
Once there, type in your email address and create a master password.
Your master password is what you will type to log into LastPass.
And it’s the only password you’ll need to remember because LastPass will remember all of your passwords for you.
A memorable passphrase is the easiest way to create a super strong master password because length is what makes passwords strong not complexity.
So come up with a random 4-5 word sentence that’s easy for you to remember like:
Example passphrase: “Morning coffee is 110% awesome”
Use the password strength checker to help you.
Then confirm your master password and click “sign up free”
That’s how easy it is to create your LastPass account.
Step 2 - Install LastPass
You can use LastPass across all your devices for free.
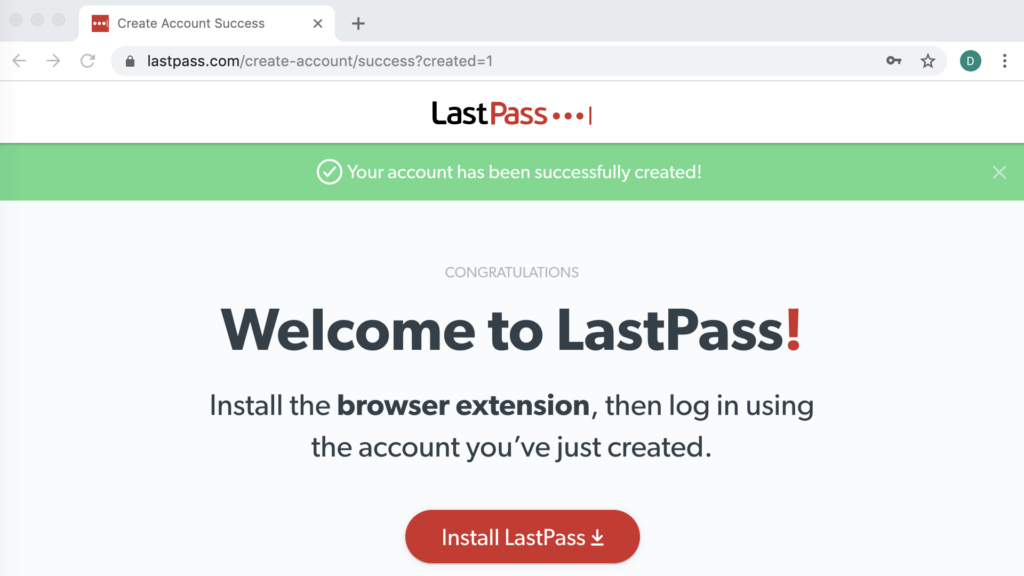
To get LastPass on your computer, click the “Install LastPass” button which appears after you sign up.
Then, add LastPass to your browser (it works for all browsers).
And log in with your username and master password.
To install LastPass on your mobile device.
Go to the app store and download the LastPass App.
Once you download the app, log in with your username and master password.
To get LastPass to work properly on your mobile device, you’ll need to enable autofill.
Just open the LastPass app, click “settings” and then “autofill”
On an android device, you’ll be able to enable autofill here inside the LastPass app.
On an iOS device, you need to enable autofill for LastPass in your phone settings.
So just follow the instructions shown in the LastPass app.
Which are to go to settings> Passwords & Accounts > Autofill Passwords > Allow Filling from “LastPass”.
I’d also recommend you disable any built in password managers on your mobile device to avoid confusion.
That’s how easy it easy to install LastPass!
Step 3 - Add Passwords
By adding passwords to LastPass, you’ll never have to remember them again.
There are a 3 ways to add passwords to LastPass.
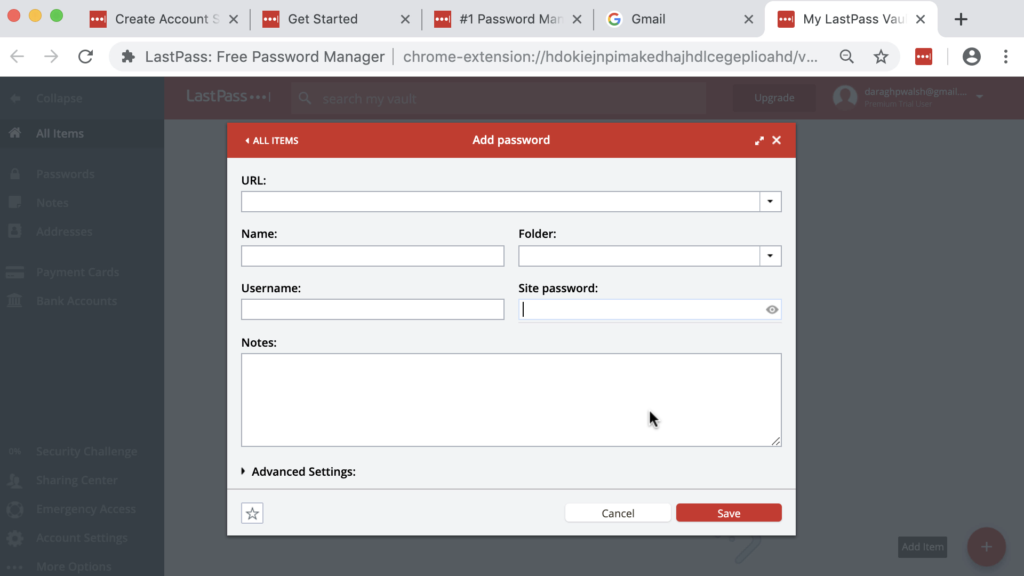
The first way is to manually add passwords inside LastPass.
Just click on the LastPass browser icon.
Open your vault and click to add an item.
Select to add a “password” and enter the url of the website like facebook.com.
Add your username and current password and click save.
The second way to add passwords to LastPass is to manually add passwords as you log into each site.
So just log into a site as you normally would do.
And you’ll see a pop window appear after you log in.
Click to add your login details for this website to LastPass.
And now the next time you log in, LastPass will autofill your password so you can log in automatically.
Repeat this process as you go through your day and your password vault will build up gradually without much effort.
The third way to add passwords to LastPass is to import them automatically.
To automatically import passwords, click on “more options” in the sidebar.
Click “Advanced”, then “import” and select the source you want to import from.
You can import passwords from a spreadsheet or another password manager.
If you want to import passwords with a spreadsheet, just click “learn more” and LastPass provides a csv template which you can download and fill out.
That’s how simple it is to add passwords to LastPass.
Step 4 - Add Payments Cards

Adding payment cards and addresses to LastPass will simply online shopping for you.
To add payments cards, click on the “payment cards” tab in the sidebar.
And click to “add an item”.
Fill out your card details.
And then click save.
Repeat the process to add as many cards and payment methods as you like.
To add addresses, click on the “addresses” tab in the sidebar.
Click “add item”
Fill out the your address along with other important shipping information like your email address and phone number.
And click save.
Repeat the process to add as many billing and shipping addresses as you’d like.
Now when you arrive at checkout.
You can simply click the LastPass icon in the browser.
Search for the card you want to use and autofill the card details.
To autofill the shipping or billing address,
Click the LastPass icon once again.
And search for the address you want and autofill the address details.
And that’s how you can simplify online shopping with LastPass.
Step 5 - Create a Digital Vault
LastPass is much more than a password manager.
Secure notes allow you to use LastPass as a digital vault to store and organise confidential documents online.
To add a secure note, click on the notes tab in the sidebar.
And then click to add an item.
Enter a name for the secure note.
Fill in the details.
And click save.
LastPass also has note templates for many important documents like passports.
To add a passport, click on “all items” in the sidebar.
Click “add item”.
Click “more items”.
Select the “passport template”.
Fill in your details.
Upload a copy of your passport if you want.
Click save.
And a new passport tab will then appear in the sidebar so you can easily find your passport details next time you book a flight.
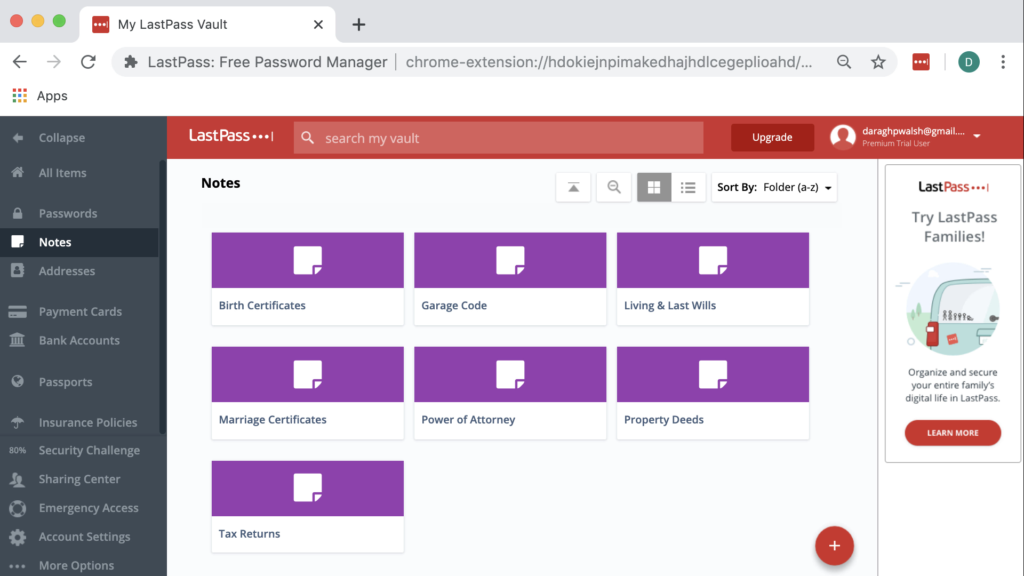
If you’d like to add more secure notes using the templates.
Click “all items” in the sidebar and repeat the process to add a drivers license, social security number, insurance policy, health insurance policy, wifi password and more to LastPass.
If there isn’t a template for what you want to add, return to the notes tab, add an item, add an attachment and click save.
I’ve personally uploaded copies of tax returns, birth certificates, wills, marriage certificates, powers of attorney, property deeds and more to LastPass.
That’s how easy it is to use LastPass as a digital vault to store and organise confidential documents online.
Step 6 - Fix Weak & Re-Used Passwords
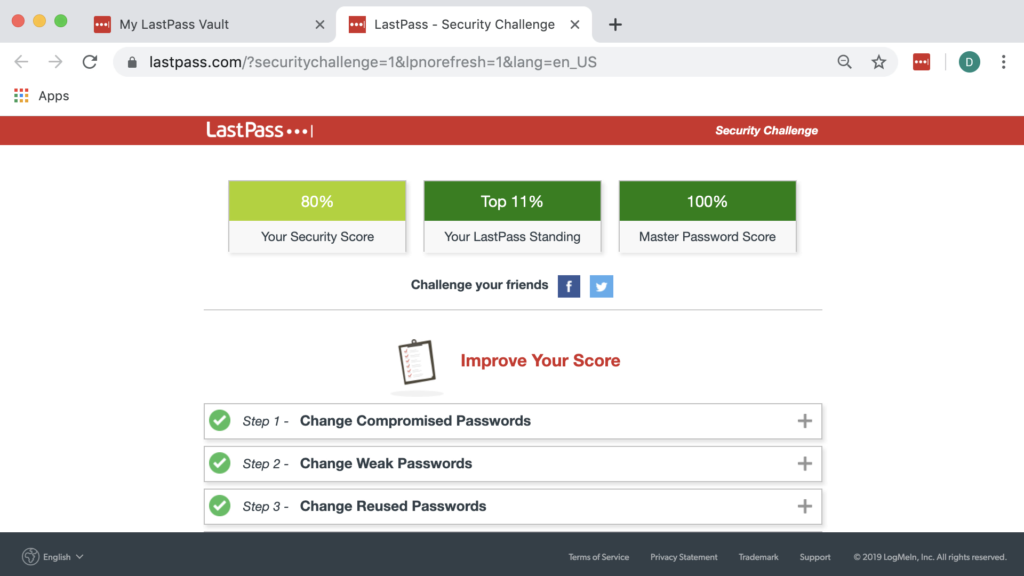
By taking the security challenge you can fix weak and re-used passwords and improve your password security.
To take the security challenge.
Click the “Security Challenge” tab in the sidebar.
And then “Show My Score”.
Enter your master password.
And wait for LastPass to analyse all your passwords.
LastPass will show you a report of all your passwords along with instructions to improve your score.
For many popular sites, LastPass can automatically change your password.
So select that site and click update now.
If the site doesn’t support auto-change, you will need to update your passwords manually.
To manually update your password.
Click to “Launch Site”
Log in with your current password.
Find the “change password’ section.
And enter in your old password.
To generate a new secure password.
Click on the LastPass icon, then select “Generate a New Password.”
And copy and paste your new password in the site.
When prompted, click “update” to save your new password to LastPass.
That’s how easy it is to change weak and re-used passwords and improve your password security.
Depending on how many different sites you’re fixing here, this can take some time, so I’d recommend you fire up a movie on Netflix and set aside a bit of time to change your passwords.
Step 7 - Enable Two Factor Authentication
Enabling two factor authentication adds an extra layer of security to your LastPass account.
Once two factor authentication is enabled, you will log into your LastPass account with your username and password as usual but you will also be required to enter a code that’s texted to you.
So even if your master password were somehow stolen, the thief would need your phone to access your LastPass account which is much harder for them to do.
To turn on two factor authentication, click “account settings” in the sidebar.
The “Multifactor options”.
And click to enable the LastPass authenticator app.
So change enabled to “yes” and click update.
Enter your master password.
Click to enrol your device with LastPass authenticator.
Then download the LastPass authenticator app to your device from the app store.
And note that this authenticator app is a separate app to the LastPass app.
Then open the authenticator app on your phone and hold it up the your computer to scan the QR code on screen.
Next, set up a back up method to receive the confirmation codes by text message.
Simply enter your phone number.
And enter the code received by text message.
Finally click to activate two factor authentication.
And now the LastPass authenticator app with be set up.
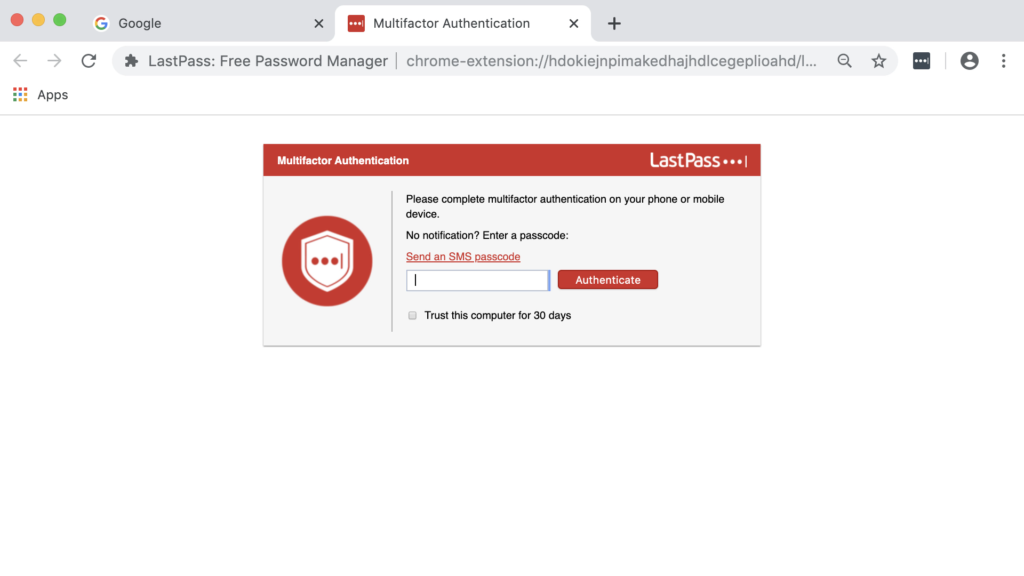
So now next time you login into LastPass.
You’ll receive a prompt to enter the code from your device.
On your phone, you’ll receive a notification like this and you can copy and paste the code or simply tap the tick symbol to confirm.
That’s how easy it is protect yourself online with two factor authentication.
And enabling two factor authentication will give you a huge boost in your LastPass security score.
Step 8 - Share Passwords

So now that you’ve fixed your weak passwords and enabled two factor authentication, you can share your passwords securely.
With LastPass, you don’t have share passwords through insecure methods like email, texting, or writing them down – any you can even revoke access anytime.
To share a password, just go to your LastPass Vault and search for the item you want to share
Click the “Share” icon.
And Enter the email address of your recipient.
By default, they won’t be able to view the password so they can’t share the password with someone else or change the password which is great for security.
Once you hit “share”, they will receive a notification by email and can login.
In the Sharing Center, you can review the sites that you’ve shared with others, or that others have shared with you.
You can revoke the share at any time if you no longer want the other person to have access.
I find this very useful when working with colleagues or freelancers on a short term project.
Now, what if you have several passwords that you want to share with the same person, or a group of people?
This is where LastPass Shared Folders come in.
Now “shared folders” are a premium feature that I think is well worth upgrading for.
Because on the LastPass free plan you can only share each password with one person.
Here’s how shared folders work:
Once you upgrade, add a shared folder.
Enter a folder name and click add.
From your vault, select the sites or secure notes you want to add to the Shared Folder
And click add.
To share a shared folder.
Click back into the sharing centre.
And click “manage” > “Manage family”.
And add a family member.
That’s how simple it is to set up shared folders.
Repeat the process to set up other shared folders.
Note that the “shared folders” feature is available on the family, premium and teams plan and works in the exact same way as I’ve shown here.
Step 9 - Set Up Emergency Access
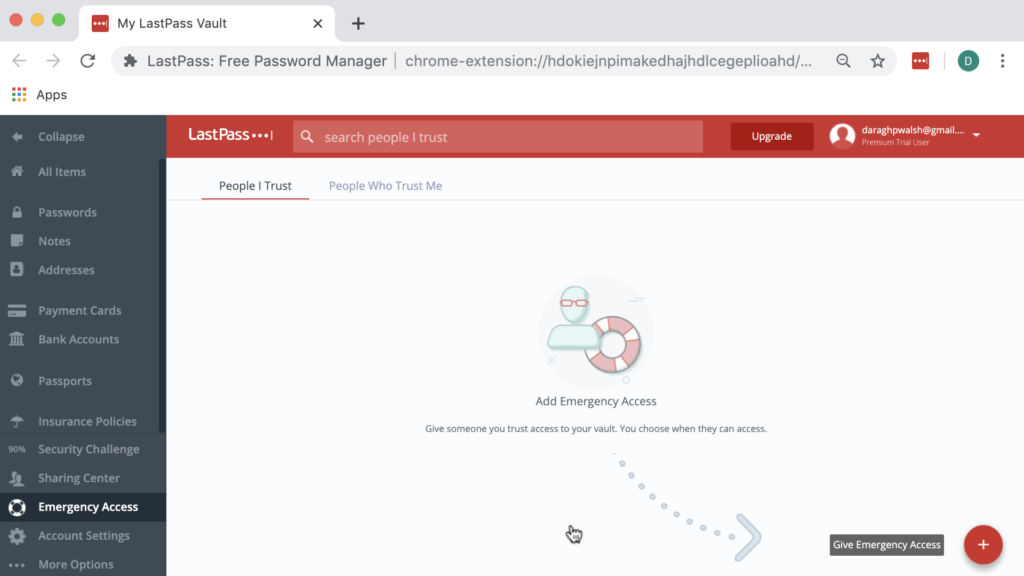
Emergency access lets trusted friends and family access your LastPass account in the event of an emergency or crisis.
Without access to your logins, simple things like paying the mortgage, keeping up with bills, and executing your final wishes could be unnecessarily difficult for them.
To set up emergency access, click “emergency access” in the sidebar.
And click to give emergency access.
Like shared folders, emergency access is a premium feature worth upgrading for because it gives you peace of mind in case things go wrong.
Here’s how “emergency access” works.
Once you upgrade click to give emergency access.
Enter your trusted contacts LastPass account email address.
If they don’t have LastPass, enter their email and they will receive an email notification to sign up.
All they need is a free LastPass account.
Next select a “wait time”.
How the “wait time” works is if you don’t deny their request for access within 48 hours they will access your account.
This is a nice feature because if you are healthy and well you can deny access when it’s not needed.
To demonstrate how this works I’m going to select “immediately”.
Finally click “send invite”.
Then, your trusted contact will receive a notification in their account under emergency access.
Instruct them to open that up and accept the emergency access.
Now if should something happen to you, they can then request access.
Once the wait time you set has elapsed.
And all of your passwords and notes will be imported into their account.
Everything will appear in a folder labelled by your email address so it’s easy for them to find.
Note you can revoke emergency access anytime and your passwords and secure notes will disappear from their account.
That’s how simple it is to set up emergency access with LastPass.
Step 10 - Choose a Plan
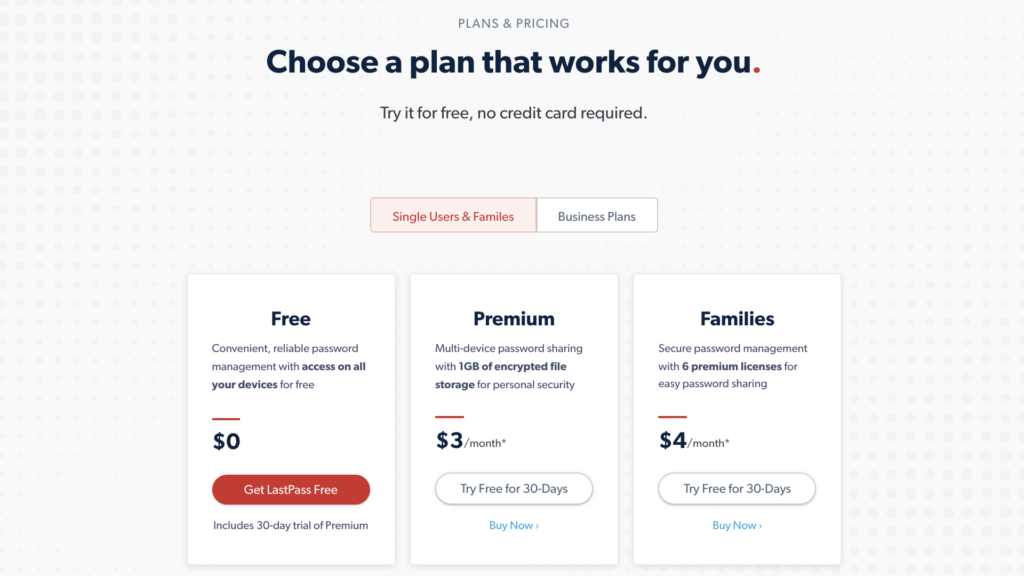
There are three plans to choose from:
The free, premium and family plan.
I’d recommend the free plan if you want to take the first step to improve your password security.
However, the premium plan gives you much more features.
You get one-to-many sharing.
So you can share each password with more than one person and use shared folders.
You also get emergency access – which is important if you have people depending on you.
You also get 1GB of storage – which you’ll need if you want to use LastPass as a digital vault to store and organise important documents.
I’d recommend the premium plan if you really want to simply your passwords and keep everything in one place.
The family plan is essentially the same as the premium plan but your get it for six users.
What a bargain!
I’d recommend the family plan, if you want to protect your families against hackers, make important documents easy to find and prepare for the unknown.
You can upgrade to the premium plan or family plan inside your account anytime.
And if you make a purchase using our referral link in the description, we will receive a commission at no cost to you so that helps us out too.
Disclosure: If you use our referral link to purchase a premium plan, we will receive a commission at no cost to you.
That’s wraps up how to set up the LastPass and use it’s best features so you never have to worry about passwords again.